Showing posts with label cardmaking. Show all posts

Monday, April 4, 2022

Floral Frame 5x7 Card

Hi friends! For todays card I am creating my very 1st 5x7 card. 
I'm using Scrappy Tails Crafts A7 Flower Cover plate die.
To start off I die cut the flower border from 110lb Neenah cardstock from Cutcardstock. 
The next step was to die cut the shadow layer. 
So I used the outer layer die and the inner die for that.
Then I colored my flowers and glued it to my shadow layer and then die cut THANK YOU FRIEND" 3x and stacked them up. I die cut the word shadows from 48lb Vellum from Cutcardstock as well.
Once that was done I glued it down to rough textured cardstock. 
I die cut 2 vellum leaves and stuck them under "for your kindness"
I added my panel to a black cardbase (130lb Epic Black cardstock) and some black splatter to the rough panel.
 The last step was adding iridescent gems to the flowers, shimmer and white gel pen to them as well. 
Thanks so much for stopping by.
Some of the links are affiliate  links & if you use them I'll receive a small commission at no extra cost to you at all.
Thanks for stopping by!πŸŒΈπŸ’—

Tuesday, February 22, 2022

The Rabbit Hole New Release-Spring Kitty Card Day 2 Hop

Hi guys! Im here today as part of a blog hop to celebrate The Rabbit Hole Designs New release. I used Spring Kitty illustrated by Tatsiana Zayats
 for my vellum card today! 
I started off by stamping my image with my go to Memento Tuxedo black ink onto 80lb Neenah cardstock from cutcardstock.  I colored it with Copic markers. I die cut it out with a circle die and then a black circle with a bigger circle die. 
Then I used Garden Trellis stencil from TRHD and I used Gray for a soft Background. Then I grabbed a reverse scalloped die cut and glued everything to my heavyweight vellum cardbase from Cutcardstock. 
I added foam tape to my circle  and and some vellum leaves.  
To finish off the card I added stickles to the flowers for sparkle & shine. 
I also added an inside panel since my card base is Vellum. 
Thats it. The next in the hop line up is back to The Rabbit Hole Designs. 

To celebrate the February 2022 release, The Rabbit Hole Designs is giving away two savings vouchers; one to a lucky Instagram follower and one to a lucky Fan Page follower. Winner will be chosen at random from the comments left on the INSTAGRAM post, and tagging friends, and also from commenting on the Fan Page post. So make sure to head on over to INSTAGRAM and look for the giveaway post @therabbitholedesignsllc and look for the post at The Rabbit Hole Designs Fan Page
by 11:59 p.m. PST 01-27-2022
Winners will be contacted via DM for the IG winner and announced in the Facebook Fanpage group on 01-28-2022

Saturday, February 5, 2022

Heart Shaped Card with Scrappy Tails Crafts

Hi guys! Im here today featuring Scrappy Tails Crafts Scalloped Heart Add-On For Chocolate Heart Gift Box die set. Scrappy Tails makes alot of 3d craft dies but they can be used as a regular die like I do!

To start of I took the 2nd largest die and die cut teal cardstock folded in half and left 1/2" of the die off the cardstock to create a hinge. 
Thats my cardbase. I sprayed it with Shimmer spray for extra sparkle. Then I took the next smaller die (scalloped heart) and I die cut Stardream Pluto Cardstock from cutcardstock. Its a 126lb opal shimmer cardstock.  Its gorgeous. I glued it to my cardbase.
The next smaller heart die has holes like the cardbase and I die cut Distress watercolor cardstock with that one. I did ink smooshing with Distress re-inkers in Peacock Feathers, Twisted Citron & Shaded Lilac on it. Once dried I stamped XOXO & Happy Valentine's day in dark gray ink. I added some Moonstone Glimmer paste for texture & shine and let it dry. 
Then I used white embroidery thread and stitched along the holes. I added foam tape to the back of the heart and adhered it to the base. I stamped my Sentiment in Archival ink on that Stardream Pluto Cardstock and trimmed it down.
I added gems along the scallops just to make it extra special. This card is for my daughter so I put a lil extra bling on it. 
I hope you like it. Thanks for stopping by. Stay crafty my friends!🎨✂️πŸ–ŒπŸ–
The above links are affiliate links. If you use any I will receive a small commission and no extra cost to you & Id be so grateful for your kindness & supportπŸ™πŸ’—


Saturday, January 29, 2022

Oceans Of Love/Mixed Media

 Hi Rabbity Friends! Kelly Fusco here with a fun mixed media card featuring The Flower Whale Stamp from the Rabbit Hole Designs


To Start off I stamped the Flower Whale image onto 80lb Neenah cardstock from Cutcardstock using Memento Tuxedo Black ink. I colored my whale with Gray Copics and I used Teals, Blues & dark reddish browns THEN I added some shimmer pen to it as well.. 
For my panel I used a piece of Distress Watercolor cardstock and I wet it with a sprayer and then sprayed Blue, Light Blue & brown onto it . I added layers of colors and sometimes drying in between. After it was 100% dry I added some texture paste with a stencil for some dimension. I wanted it to look ocean-y. Is that a word? lol
Then I took my paper distresser and distressed the edges of the panel. I fussy Cut my whale out and I die cut the word "Love" and stacked it 3x high.
I added foam tape to the back of the whale and I curved my Love sentiment to curve along the top of the whale. 

I added Glossy Accents to the LOVE & to the floral parts of my whale and a few Bubble Blower Gems from Trinity Stamps. Thanks for stopping by.

Tuesday, January 25, 2022

Day 2 The Rabbit Hole New Release Hop

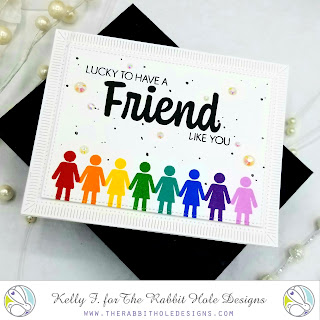
 Hello Rabbit Hole Friends! Its Day 2 of the New Release hop & I'm definitely feeling a rainbow vibe. For todays cards I'm using simply the Friend stamp for both

To start off I used The image of the woman and positioned it in the MISTI so I could just shift my cardstock and repeat stamping easily. I used Catherine Pooler inks for every color. Rockin Red, Orange Peel, Tiara, Grass Skirt, Aquatini, Suede Shoes, Royal Treatment & Pixie Dust. I then stamped my "Friend" & sentiment in Versafine Onyx ink. Then I used a Black Glaze Gelly Roll pen for my black splatter which I applied manually. Lastly I added some iridescent gems for some sparkle. 

I added foam tape to my panel and mounted in to my 110lb Neenah card base from Cutcardstock. For my 2nd identical card I used the man image and did the same thing but I used a black mat under my panel and I added some Pops of Color in Clear & Snowflake.


I hope you like these cards & you check out the new release! The next hop is  Deana-

To celebrate the February 2022 release, The Rabbit Hole Designs is giving away two savings vouchers; one to a lucky Instagram follower and one to a lucky Fan Page follower. Winner will be chosen at random from the comments left on the INSTAGRAM post, and tagging friends, and also from commenting on the Fan Page post. So make sure to head on over to INSTAGRAM and look for the giveaway post @therabbitholedesignsllc and look for the post at The Rabbit Hole Designs Fan Page
by 11:59 p.m. PST 01-27-2022
Winners will be contacted via DM for the IG winner and announced in the Facebook Fanpage group on 01-28-2022

The above links are affiliate links. If you use any I will receive a small commission at NO extra cost to you. And Id be super grateful. Stay Crafty My friends!

Thursday, January 20, 2022

Clarence Loves YOU! Ink Spray Fun

 Hi Guys! Kelly Fusco here with my very 1st blog post for The Rabbit Hole Designs featuring the Clarence & Clarice Stamp.

To start off I stamped my image onto 80lb Neenah cardstock from Cutcardstock with Memento Tuxedo Black ink. Then I colored in the image with copic markers. I used C05,C03,C01 & C0 I used a couple browns E31,E33 & E35. Then I took the Garden Trellis stencil and I sprayed it with distress spray stains (red,yellow,blue) in a rainbow order across my panel. I removed the stencil & went over it again with the coordinating colors in distress inks using my Bitty Blenders so the white wasn't too bright white. 
I originally had the stencil on a diagonal so that created these white stripes where the stencil border was. I added a few black dots to it 
I colored in the background of my image with Copic 100. I die cut it out with a scalloped oval die and colored the scalloped edges gray to match Clarence. I added foam tape to the back of my focal image & I die cut the word YOU and colored it to match the rainbow theme.
Its hard to see in pics but I added some glossy accents to his eyes, teeth, cheeks and the "LOVE" as well as the "YOU"
I took a black copic marker and went around the edges of my rainbow panel for a bit of definition. 
I added a few iridescent gems and I was done. I hope you like this card. 

If you get a chance stop by The Rabbit Hole Designs for more inspiration or to check out their shop. If you use any link above they are affiliate links. If you use any I will receive a small commission at NO extra cost to you. Thank you so much & stay crafty my friends!

Sunday, January 9, 2022

Clarence & Clarice Love Each Other! The Rabbit Hole Birthday Hop

Hi Friends! For my 2nd card for The Rabbit Holes Birthday Hop I'm using the Clarence & Clarice stamp. 
To start off I stamped my image with Memento black ink onto 80lb Neenah Cardstock from Cutcardstock. 
I used my copics to color them and I drew a line on the ground with a Memento Marker. I then ripped the edges and added a bit of black from a blending foam pad (whatever was on it already). 
Then I grabbed a piece of heavyweight Vellum (48lb) also from Cutcardstock and I ripped that too.
I die cut the word "Love" from The Rabbit Hole and stacked it 3x. Colored with copics to match and added Star Dust stickles & then Glossy accents on top. Those 2 together look AMAZINGLY COOL!
I then took a 100lb Desert Storm Neenah card base (also from Cutcardstock) and I used The Rabbit hole Garden Trellis stencil and White pigment ink for the background and heat set it. 
Then I glued the vellum down (not the outer edges) and then added foam tape to my image panel. I adhered it all down and added "My Sweet" and "Love" to it. 
I added glossy accents to the heart, their eyes, ears, teeth & tongues. A bit if stickles to the skirt & bow. A few iridescent gems and thats it. 
I hope you like it. Next in the hop is Deana- www.designcreativebling.com 
 To celebrate the Birthday release, The Rabbit Hole Designs is giving away two savings vouchers; one to a lucky Instagram follower and one to a lucky Fan Page follower.  Winner will be chosen at random from the comments left on the INSTAGRAM post, and tagging friends, and also from commenting on the Fan Page post.  So make sure to head on over to INSTAGRAM and look for the giveaway post @therabbitholedesignsllc and look for the post at The Rabbit Hole Designs Fan Page by 11:59 p.m. PST 01-12-2022  Winner will be announced on The Rabbit Hole Designs blog 01-14-2022

The above links are affiliate links. I receive a small commission at NO extra cost to you if you use any. And Id be so grateful :) Stay safe, stay healthy & stay CRAFTY!

Saturday, January 8, 2022

Clarice Surprise Tag Card/Birthday Hop

Hi Guys! I'm so excited to announce I'm a new member of The Rabbit Hole Design team. And for my 1st project I'm using "Clarice Surprise".
Its a 4x3 stamp so the price point is great!
To begin I stamped my image onto 110lb Neenah cardstock from Cutcardstock. I colored it in with Copics keeping with a rainbow theme.
I used Judikins masking paper (Love this) and i created a mask by fussy cutting it. 
I then used Distress Oxides in Candied Apple, Mustard Seed & Prize Ribbon. The overlapping caused Green & Orange. I added water splatter and outlined my tag with a black marker. While that dried I used the Garden Trellis stencil from TRHD & I used a light gray ink for my base panel. I used Spellbinders Fluted Classics to cut that panel for that stitched border look. 
Then I mounted my tag with foam tape. I used Epic Black cardstock for my Sentiment w/White Embossing powder. I glued 1 side with glue & 1 side with foam tape so it laid flat. 
I added some black string and black "splatter" with a Glaze pen.
I also added some Glossy Accents for the eyes, cheeks & teeth. 
I glued it down onto a 110lb Neenah cardbase from cutcardstock. 
I added a few iridescent gems and thats it. 
I hope you like it
Next hop is Deana. 
To celebrate the Birthday release, The Rabbit Hole Designs is giving away two savings vouchers; one to a lucky Instagram follower and one to a lucky Fan Page follower.  Winner will be chosen at random from the comments left on the INSTAGRAM post, and tagging friends, and also from commenting on the Fan Page post.  So make sure to head on over to INSTAGRAM and look for the giveaway post @therabbitholedesignsllc and look for the post at The Rabbit Hole Designs Fan Page by 11:59 p.m. PST 01-12-2022  Winner will be announced on The Rabbit Hole Designs blog 01-14-2022

The above links are affiliate links & if you use any I will receive a small commission at no extra cost to you whatsoever.  Thanks❤πŸ€—Stay Crafty

Friday, October 29, 2021

Freestyle panel/Floral Bday card

Hi guys! Kelly here. For this card Im using Altenews "Beauty Within" Stamp & Die set. I have the coordinating stencil but I didn't use it or need it for this card. 
To start off I stamped my Images onto 80lb Neenah cardstock from Cutcardstock. I used Copics to "flick" color onto them. I used:
RV10,RV21,RV23 & RV25
V20,BV20,BV01,BV02 & BV13
BG10,BG23,BG45, & BG13
YG11,YG03,YG25 & YG17
the centers I used YR24 & YR27
Then I die cut everything out. 
Once I laid out how I wanted them to appear I used Press n Seal and press it onto my layout, flipped it over and added glue and foam tape so its 1 large arrangement. 
Now comes the FREESTYLE....I took another 80lb panel of Neenah and I used the CHISEL side of my black Copic and from the outside edge I swiped in like a brushstroke. I repeated that down the left side of my panel. 
I grabbed 3 copics from the flower colors and added dots to the panel. 
I then die cut this above panel with a rectangle embossed edge die from Kat Scrappiness. 
Then I glued it to my 110lb Neenah cardbase from Cutcardstock. I removed the liner from the foam tape and adhered it to my panel on my cardbase. I added a bit of shimmer pen and black glaze pen to the dotted centers.
Then I added my label sticker Sentiment. Done.
I was  going to add some gems but decided this card had enough going on. Thanks so much for stopping by!❤

Friday, October 15, 2021

Cutest Chubby Snowmen Ever!

 Art Impressions Chubby Snowmen is one of my favorite snowman stamp sets! I'm excited to show you this card.

To start off I took a strip of masking tape and sectioned off the bottom half of my panel which is 110lb Neenah cardstock.  I cut a freestyle mask for the ground as well. I used distress oxide inks in colors Chipped Sapphire & Blueprint sketch for the bottom. I splattered a bit of water for interest.
The top half of my panel I masked off in the middle vertically and I used faded jeans on the left and hickory smoke on the right. I added water splatter to these sections as well then I cut a thin piece of Holographic cardstock and glued it down on the trimmed borders. 
While that dried I stamped the images onto 110lb Neenah and colored them with copics.
I stamped my Sentiment with versamark and added white super fine Embossing  powder and heated it. 
I propped my images up on foam for dimension and adhered them to my panel.
I added white gel accents to my images and white "stars"  to the background with the gelly roll pen.
I also added some clear gelly roll pen for some extra shine. And some sparkle pen for the lights on the tree.
I had alot of fun creating this card & I hope you like it. 

Thursday, September 16, 2021


Hi Guys! For todays blog post (also on Butterfly Reflections Ink blog) I'm using Honey Bees Lovely Layers Maple Leaf Die. This die set is AMAZING & makes creating leaves so easy! This die set was a gift to myself, for my birthday TODAY!! lol :)
 To start off I grabbed some Alcohol ink panels that had "Autumn Colors" and I used the shadow die and die cut it. Then I grabbed some white & Gold cardstock and die cut the top layer (2 white & 1 gold). I glued them all together. I added a gold bow on top of the stem base using Altenew Metallic Thread and glued it onto my base panel (pierced die plate) which was added to 110lb Kraft Cardstock.
I made a few cards with slight variations (Background, sentiments & embellishments)
The one above (sentiment) is Altenew Label Love  & the Embellishments are the AMAZING Satin Gold From Trinity Stamps. 
What's great about this die from Honey Bee is you can use anything as your shadow layer.  I just happened to use Alcohol inks because I had them made. You can make a striped layer with scraps, a patterned paper layer, mirrored cardstock or anything!
Here's a 3rd card I made below. So easy & fast to put together!
 This one I left plain & the background is Memory Box Pinpoint leaf. 
Thank you so much for stopping by! Have an awesome UnbeLEAFable day🍁❤🌞

Saturday, August 14, 2021

No Line Copic Coloring

Ok so lets face it, no line coloring is without a doubt a commitment of time. However the results are always beautiful. 
I started off stamping the image with a light gray ink. 
One that I can see but can be covered by coloring. I used a copic friendly Fog ink. 
I stamped it onto 110lb Neenah cardstock from cutcardstock. 
Then i started off with the sunflowers. I used 3 shades of yellow (YR23,YR24,YR27)
Im not the best at it but I enjoy it. 
Then for thr tulips I used 3 deep reds (R56,R39,R59)
The Greens were (YG03,YG17,YG67)
The background I colored using some light blues (B000,B00,B02)
And a couple browns for the flower centers. I used a white Gelly roll pen to add highlights and "splatter dots" for a bit of interest.
I die cut the "thanks" 3x with black cardstock (135lb Epic Black Classic Crest) from cutcardstock 
And on top I added black glossy cardstock. 
The shadow is vellum which i die cut with double side adhesive on it so the glue wouldnt show.
I added some clear droplets and thats it. 
I hope you like it & thanks for stopping by!
HugsπŸ€—πŸŒΌ

Saturday, June 12, 2021

Easy Floral Watercolor card

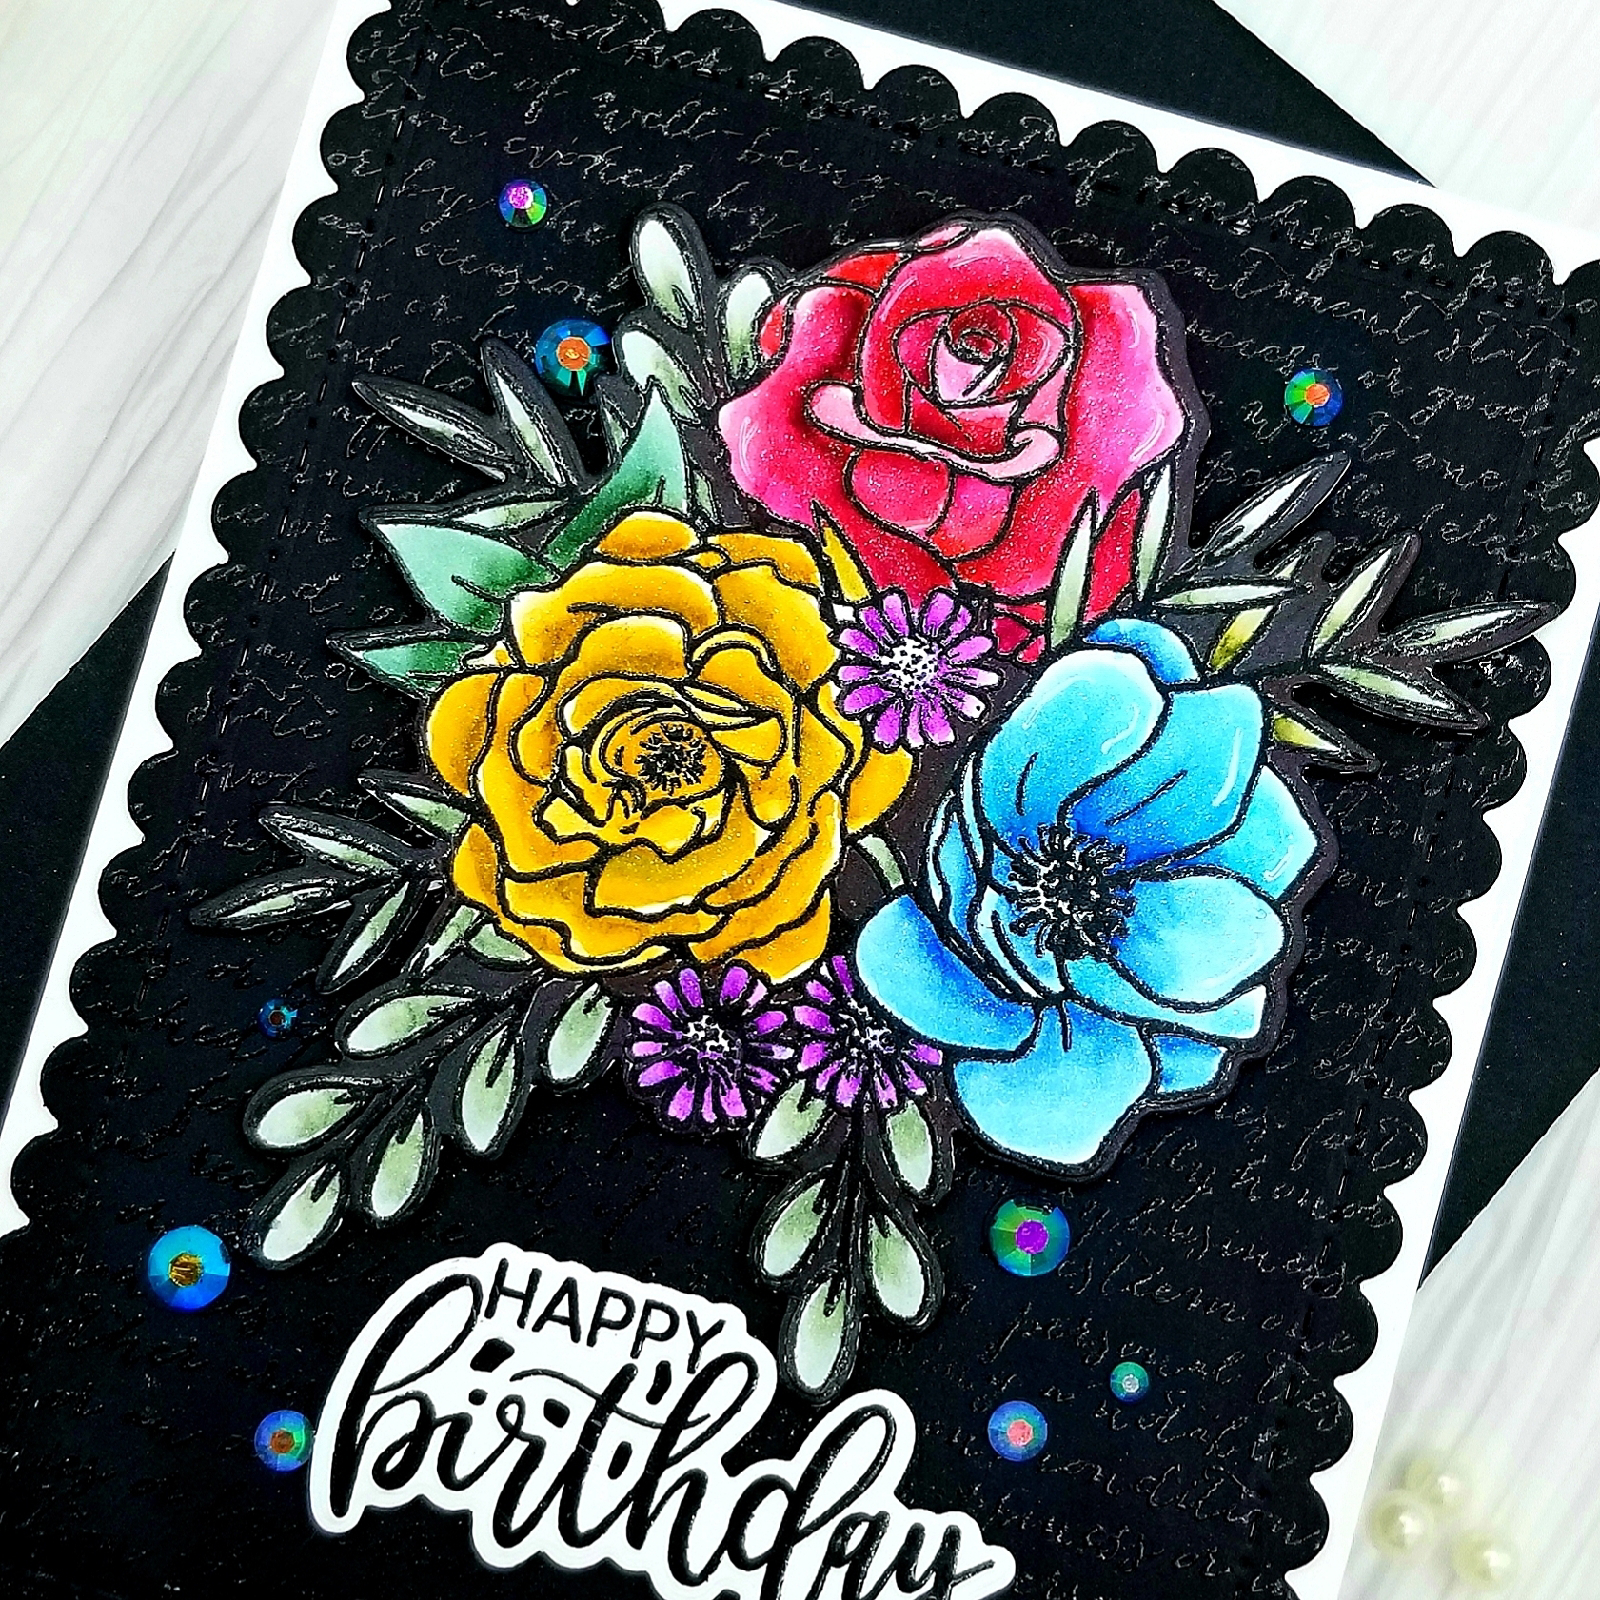
For this card I used all Hero Arts Products. I stamped the Togetherness floral bouquet onto Bristol cardstock with Versafine black and added clear Embossing powder on top.  I then used a combination of Tombow markers in blues,lavenders and purples to get a multi-colored look. I used a lime green for the leaves and added some shimmer pen to the flowers. 
The Sentiment was Hero Arts Thanks Stamp & Cut, a set i use ALOT! 
For the Background i stamped Hero Arts Script Background stamp onto Neenah Epic black 130lb cardstock from cutcardstock using Hero Arts Unicorn white pigment ink.
I can not recommend this cardstock enough. Its FABULOUS! So smooth and black. Its amazing!
 I added a lavender mat onto a  110lb neenah cardstock cardbase. A few pearls from Trinity Stamps to match and its done.
I made a 2nd card in a similar way but i heat embossed the Background in clear and changed up the colors and Sentiment. 
I hope you like them. Have an awesome day and thanks for stopping by πŸ€—πŸŒˆπŸŒž

Friday, September 25, 2020

Shiny Daisies

Its no secret Im a  big fan of Glossy Accents. I use it with a fine tip for glue and For shine. 
For this card I used Trinity stamps "With Sympathy " stamp and "A sentiment for almost everything " and some gems.
To start I stamped my image onto 80lb Neenah from Cutcardstock with Memento Tuxedo black. It never smudges with Copics. I colored my flowers. Let them dry. I colored my background with Black copic in long even strokes to avoid streaking.Then I die cut my panel with a stiching die and another for the white mat. 
I propped that up onto some fun foam for dimension. 
I added some gems to finish it off. To be honest it really looks better in person. Its hard to capture that shine in photos. 
Stay safe, Stay Happy, Stay CRAFTY!πŸ’—✏πŸŽ¨πŸ–ŒπŸ–